The shadow problem
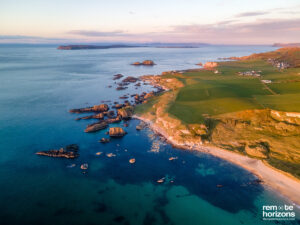
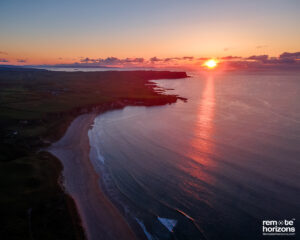
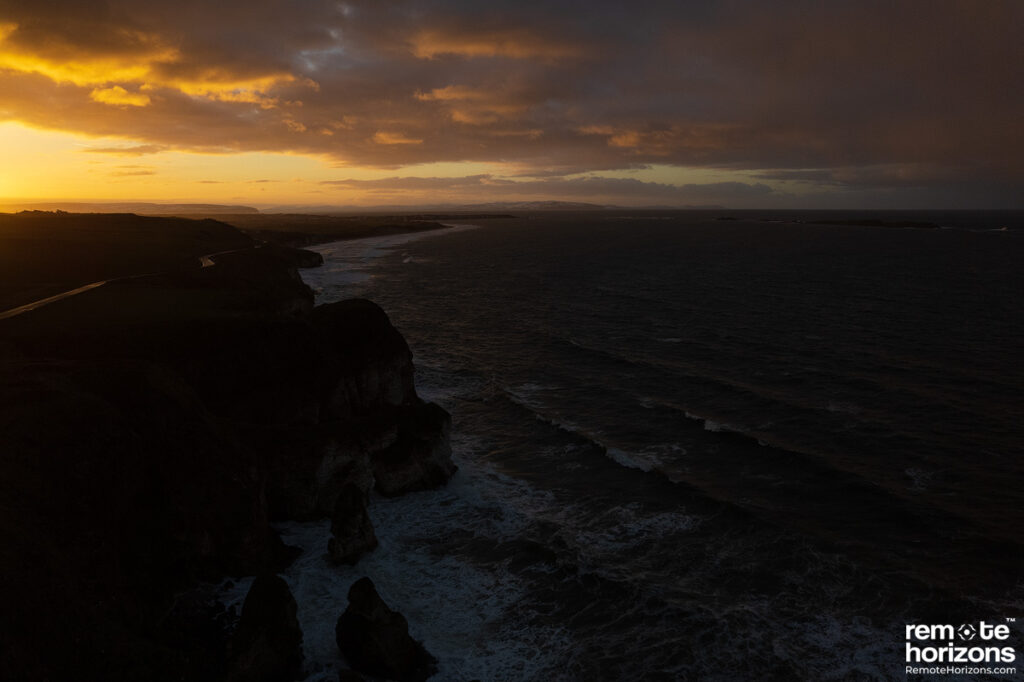
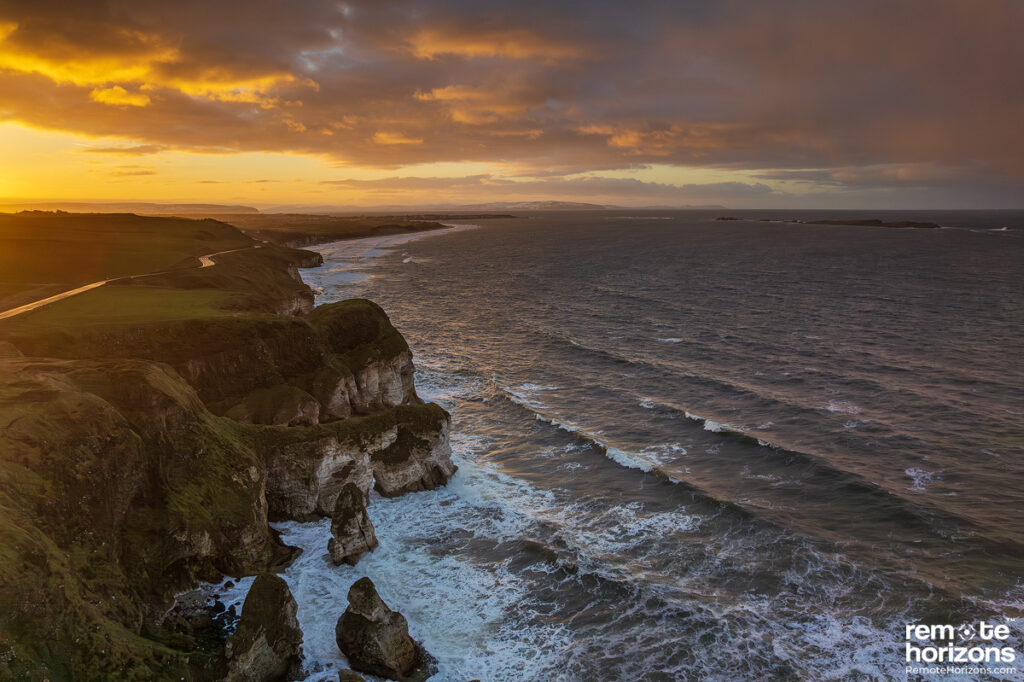
Capturing a high-contrast landscape photography scene is technically challenging. Despite huge advances in camera technology, photographing towards the sun often forces a photographer to expose for the highlights in the image, resulting in very dark shadows. The darker aerial landscape photograph above is a typical single exposure shooting into the sun with sky detail retained, but with very dark shadows. The image on the right is more balanced with detail in both sky and shadow, but this is more difficult to achieve.
There are typically 3 ways to address the problem, which may be used singularly or in combination:
- Graduated neutral density filters will be attached to the lens and used to darken the sky when the photograph is captured. This is not practical for drones as the filters cannot be repositioned in the air.
- HDR (a bracketed image sequence) will be used to capture a range of exposures which are then merged in post-processing. This sequence will typically capture properly exposed highlights and shadows. Movement within the landscape between frames (e.g. waves) can create strange artifacts in the resulting image.
- Recovery of shadows from a single RAW file using software during post-processing. Brightening shadows often creates a lot of noise and false colours in the image, severely degrading quality.
As I have highlighted, each of these methods has an inherent limitation. The most straightforward solution would be to capture a single file exposed correctly for the sky, followed by a shadow adjustment to balance the exposure. The new Adobe AI Denoise tool may now make this option more viable by improving RAW file quality, allowing us to brighten shadow areas and still maintain good image quality.
Adobe Lightroom/Camera RAW AI Denoise Interface

Adobe Denoise is found within the Enhance Image interface within Adobe Lightroom and Camera RAW. The most straightforward way to access this tool is to right-click on a RAW file within either photograph and choose Enhance Image from the drop-down menu. The default setting is 50% and I have not so far found any need to deviate from this. You can of course tweak this according to your own tastes. RAW Details, another Adobe tool is applied automatically when using Adobe Denoise. The screenshot of the interface above already gives some indication as to the dramatic image improvements which are possible.
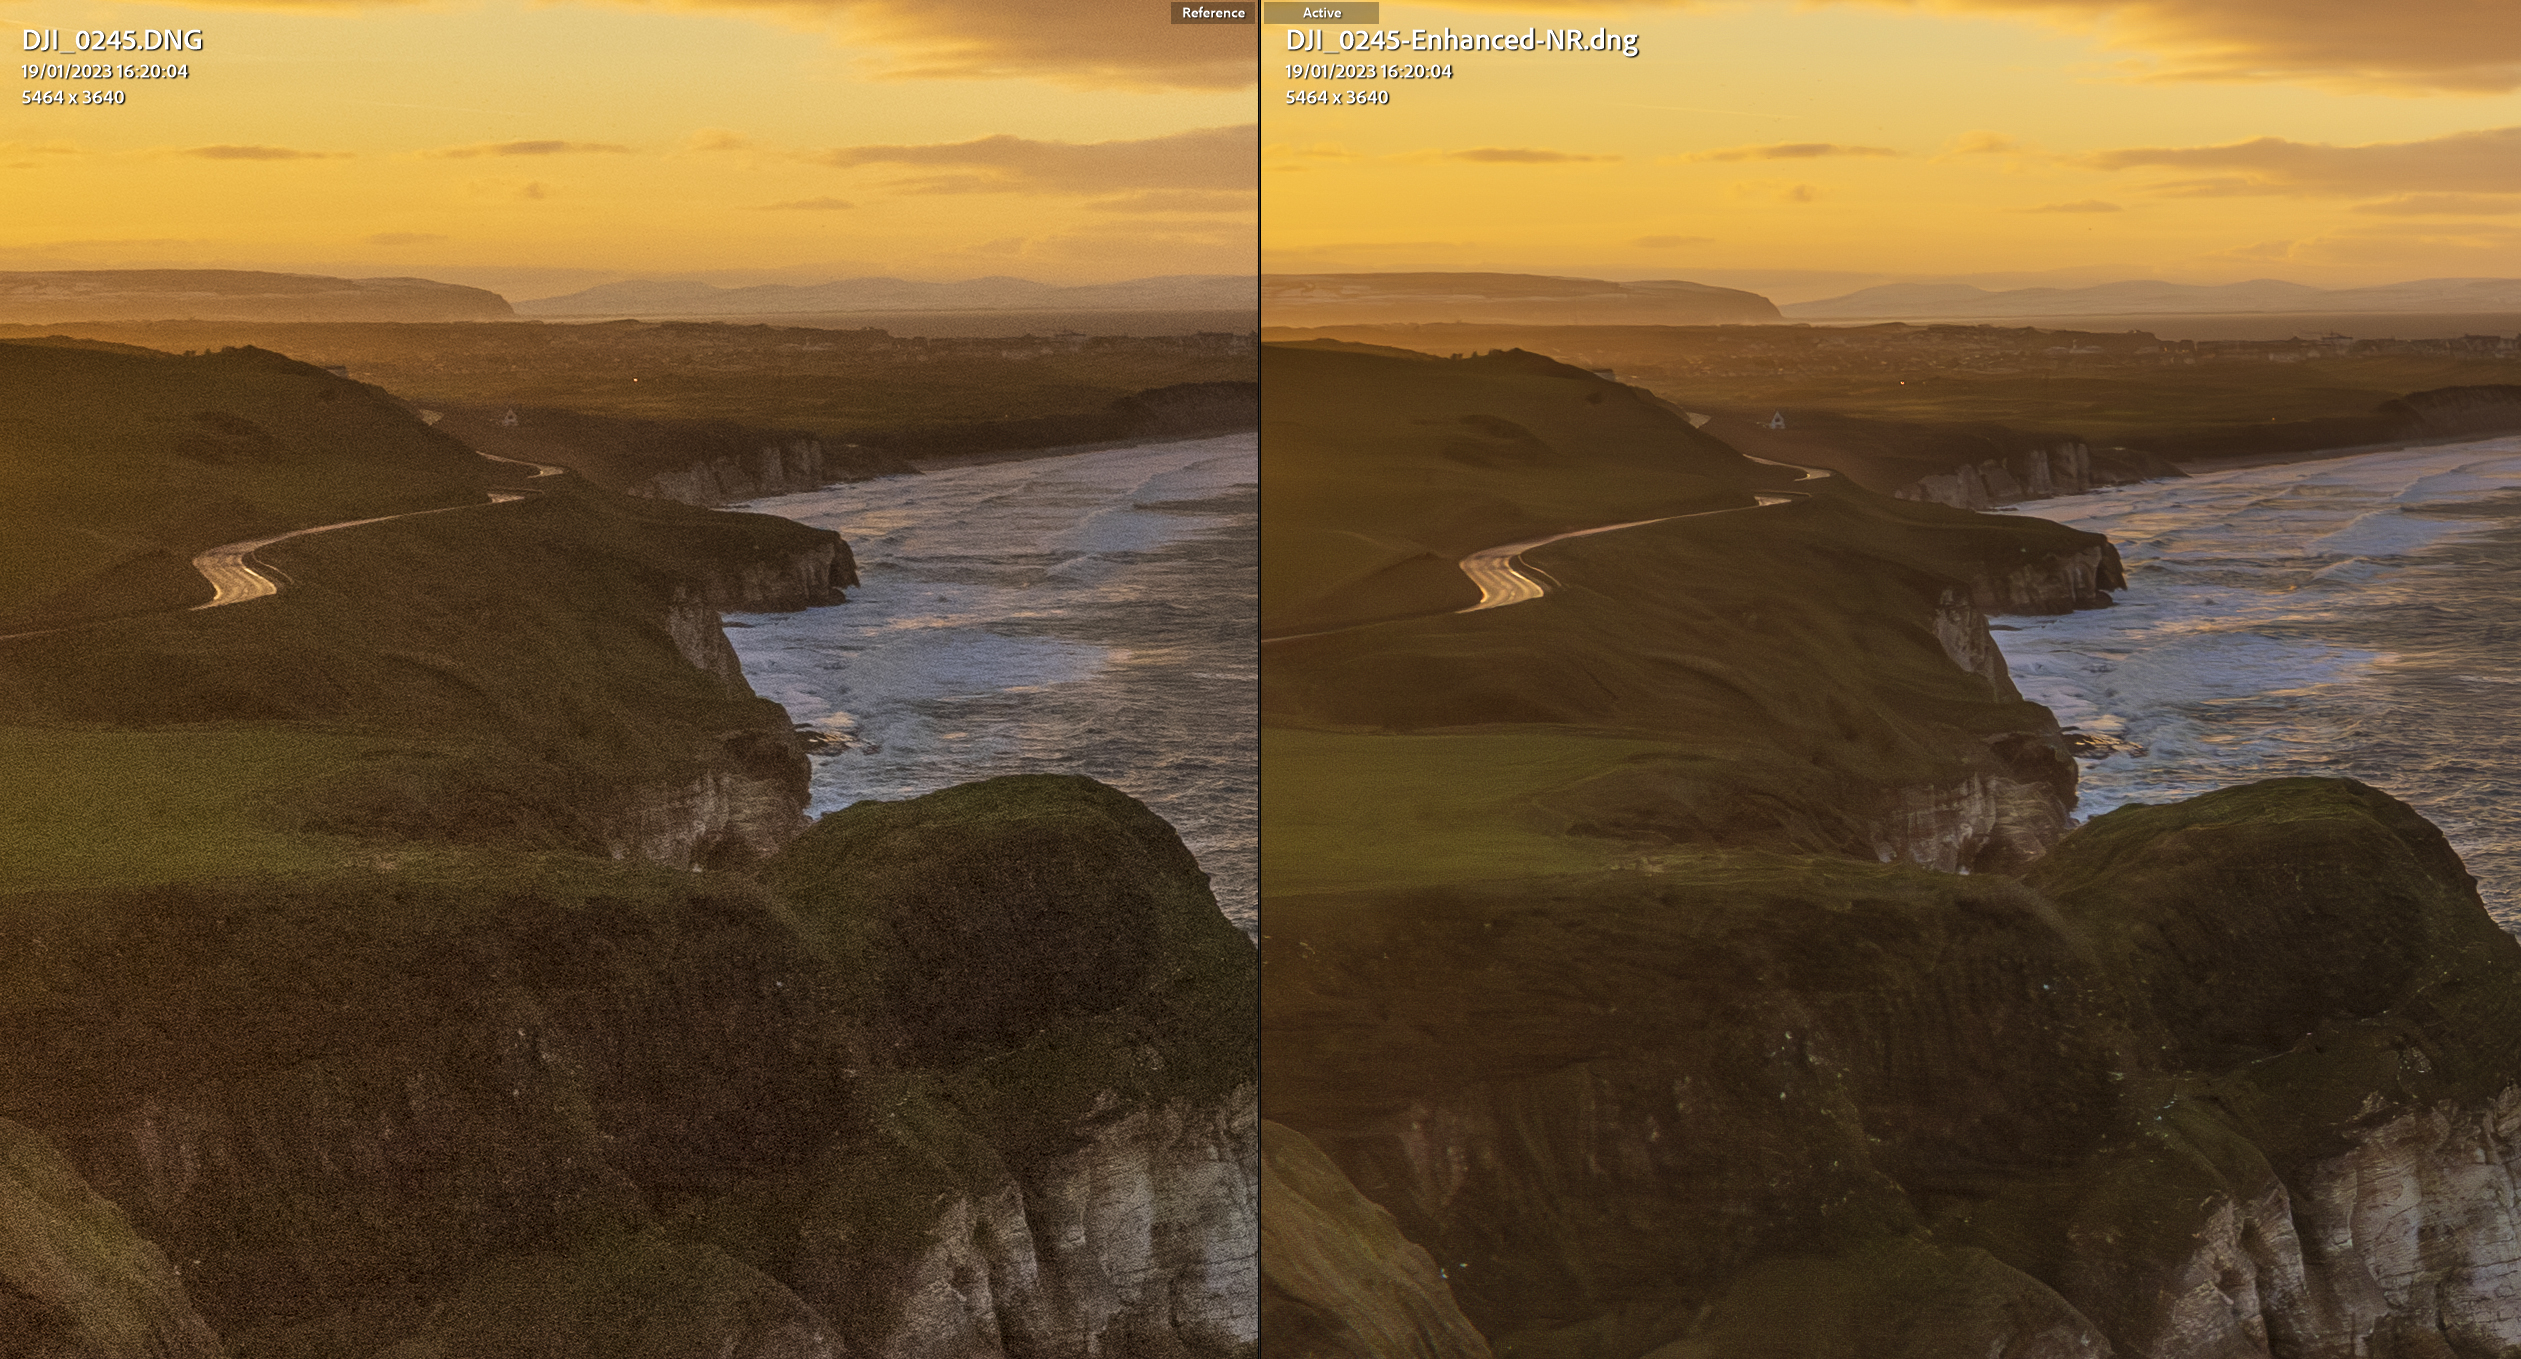
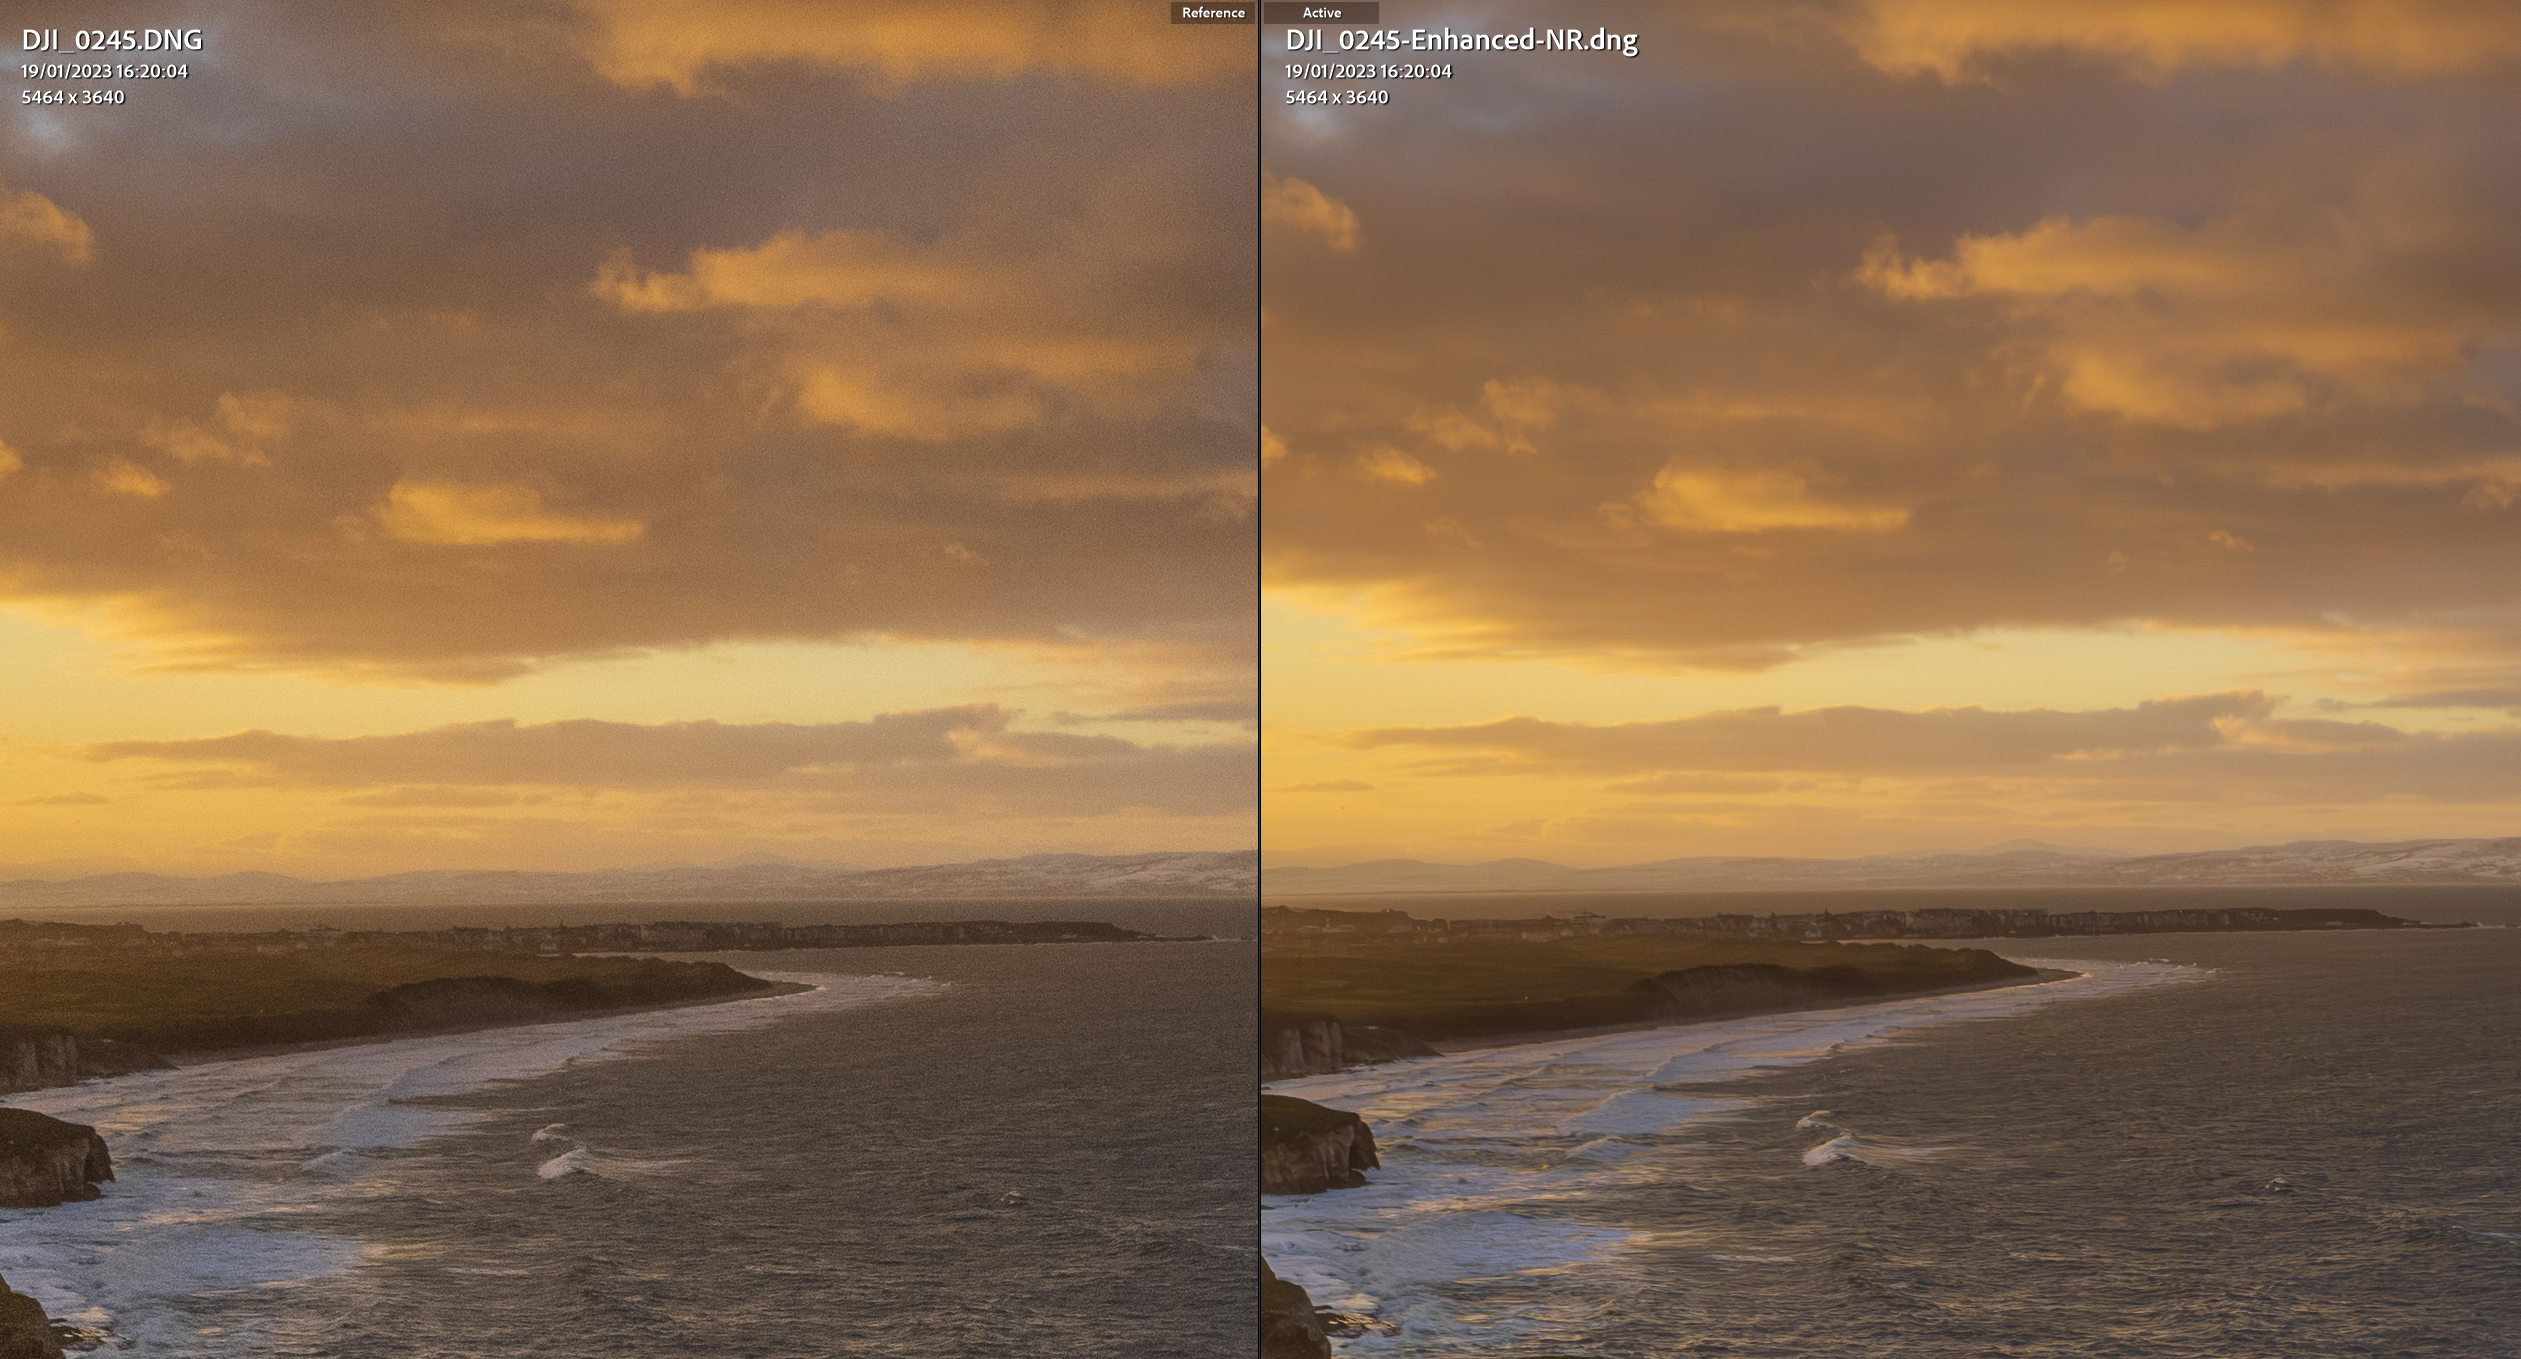
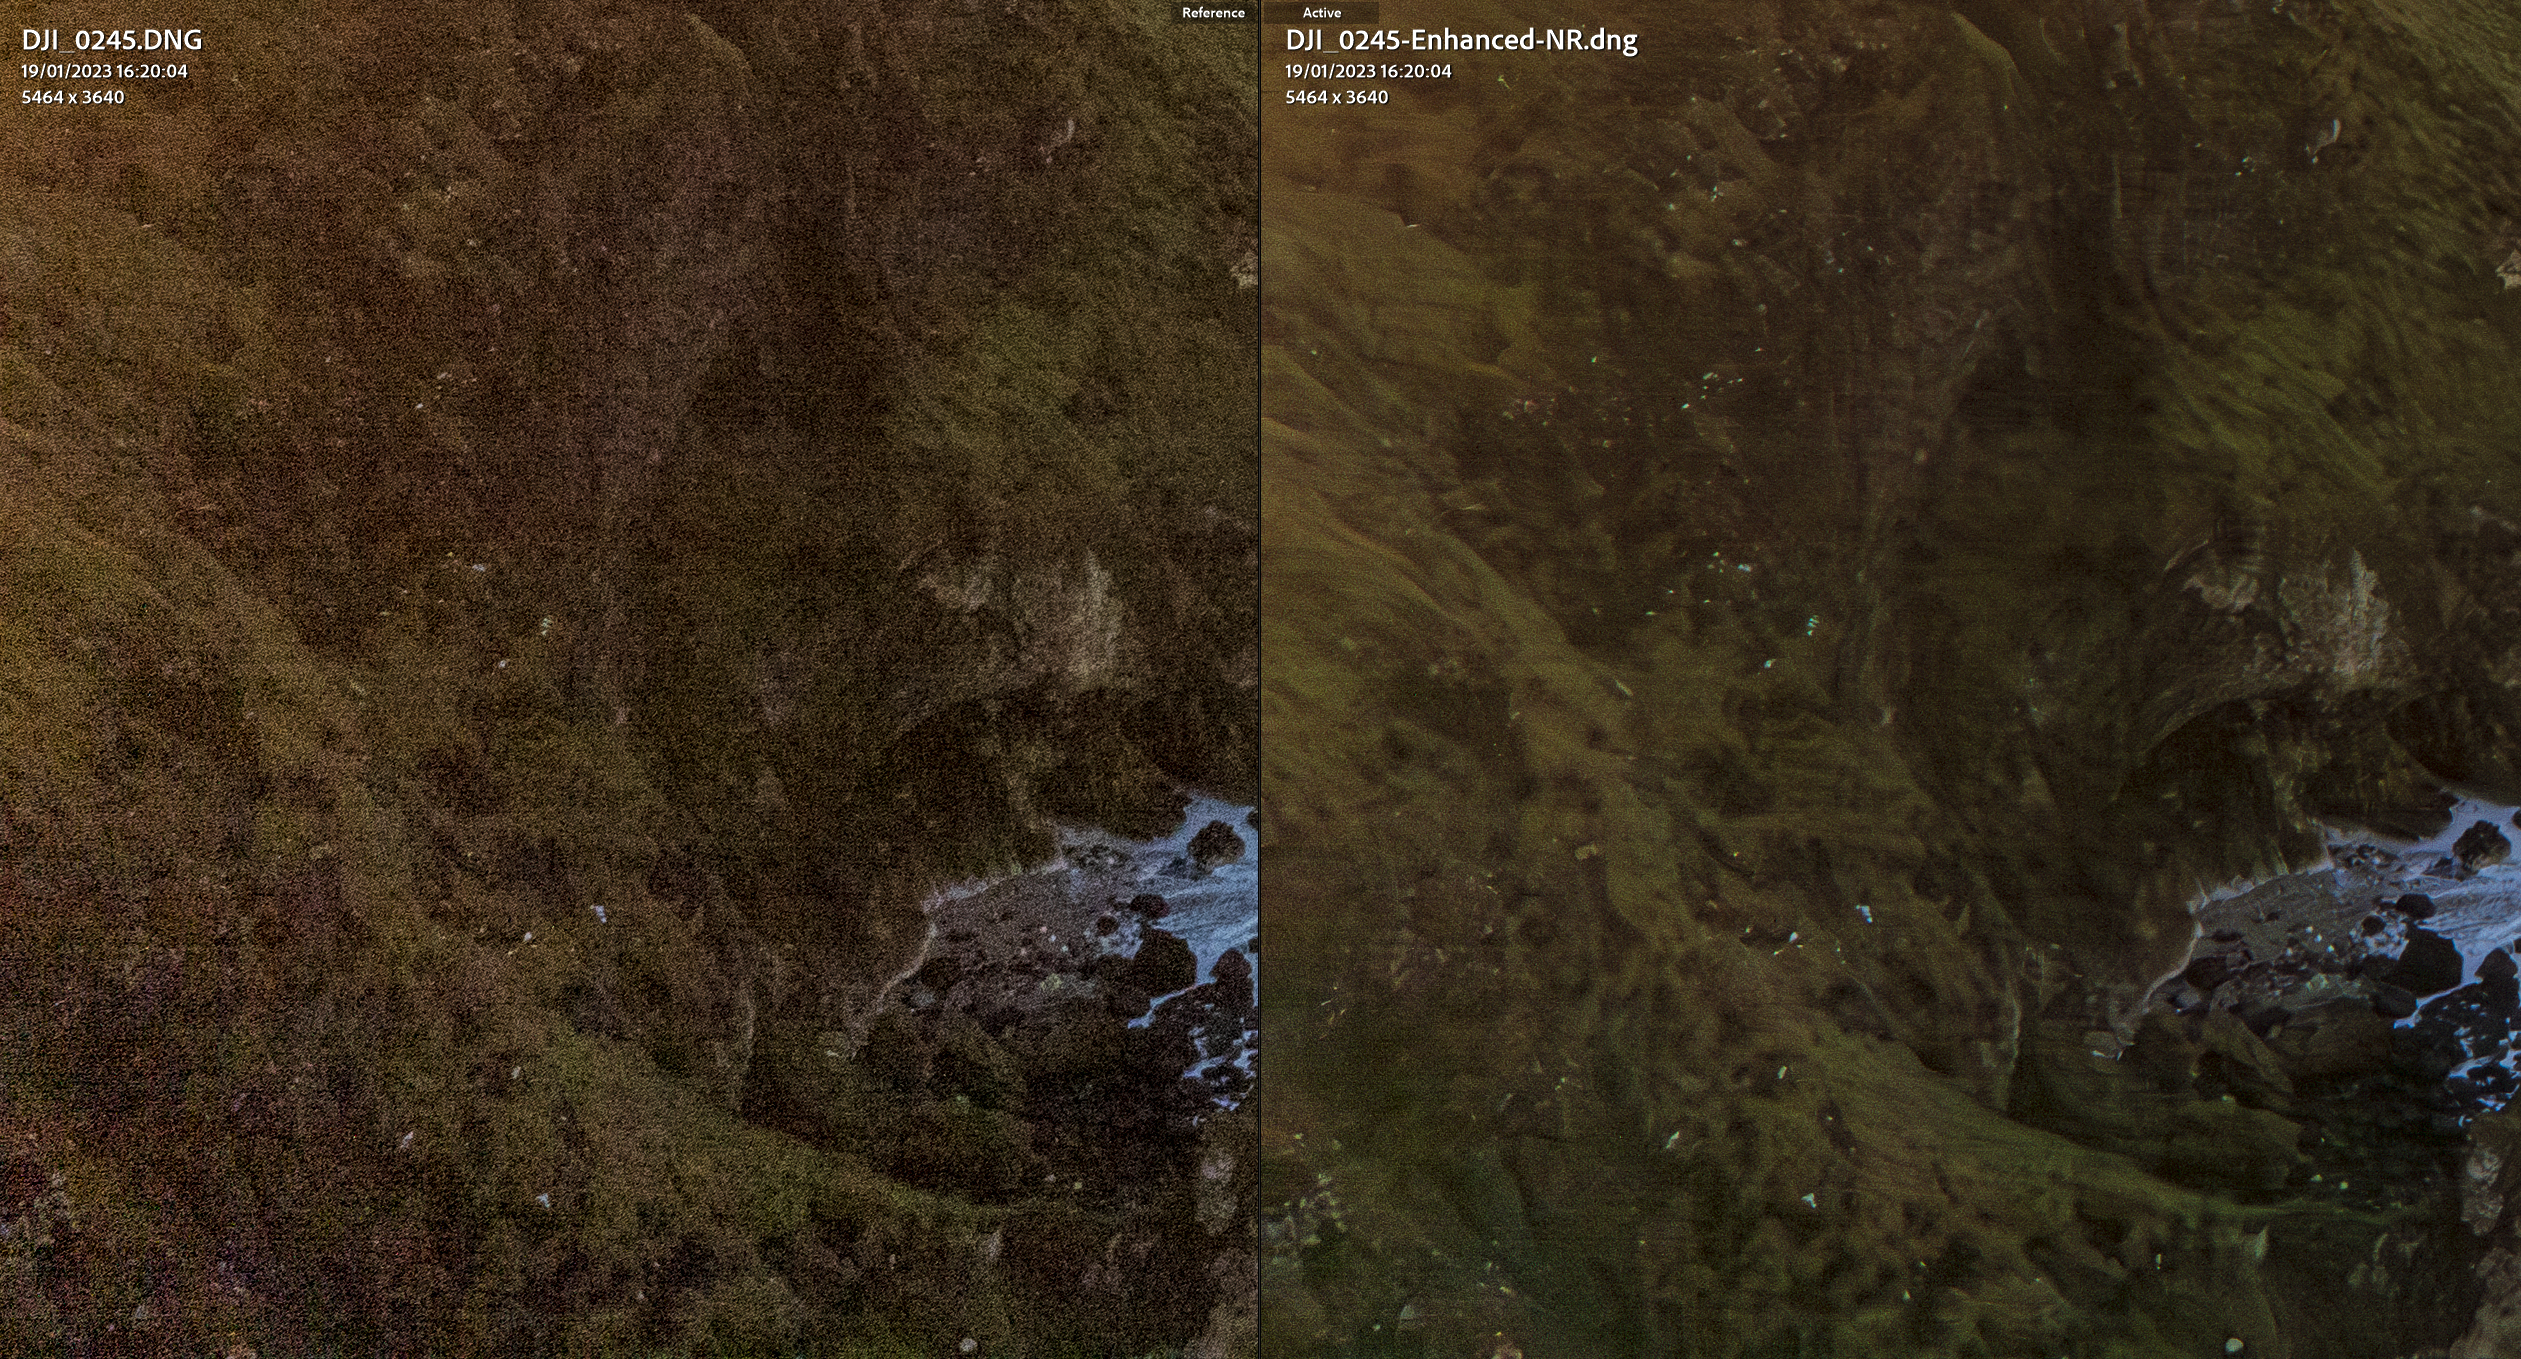
Comparison of images processed without and with Adobe Denoise

This dark image above is a single RAW exposure. The series of comparisons below show this image with RAW adjustments made in Adobe Lightroom. The images on the left were processed without using Adobe Denoise first, the images on the right had Denoise applied before making adjustments. The adjustments applied to each image were the same.
Is the Adobe Denoise the solution aerial landscape photographers have been waiting for?
The example I have used here is deliberately extreme – I wanted to show you how successfully this technique would cope with the darkest of shadows. The following are important considerations:
- Adobe Denoise is very effective at removing/controlling noise in dark and bright areas of an image.
- By removing noise, it reveals fine detail in an image which would be particularly advantageous when making large prints.
- It controls the noise levels in the sky, allowing you to increase contrast or use dehaze without producing lots of noise. In landscape photographs this is particularly important as most RAW file skies require such adjustments.
- It can introduce false colours in the very darkest recovered areas.
Everything considered, will Adobe Denoise allow you stop shooting bracketed photographs for HDR and capture single exposures only? The answer is, it depends. If you use your images for web use only it may well be a way to dramatically simplify your workflow as the limitations may not be a game-changer at small sizes. However, if you consider yourself a perfectionist or produce printed work, I think you should still continue to capture a bracketed sequence, despite the file storage and other limitations already referenced.
As drone image quality and Adobe technology both improve, I anticipate that in future we may all become single exposure shooters!